This article will walk you through all the steps to connect your AI agent to your existing Google, Outlook, Apple, or any other calendar.
FluvioAI Agents use an intermediate calendar service, cal.com, in order to talk to your existing calendar. This service allows us to safely connect to your calendar, download schedules and book appointments.
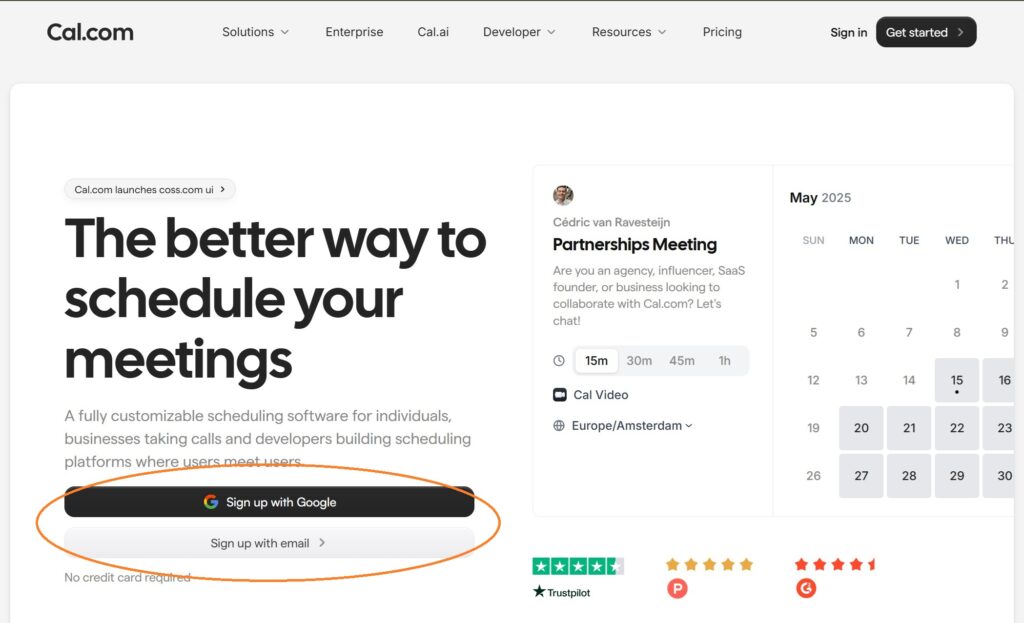
1. Create an account
First, go to cal.comand create a new free account.
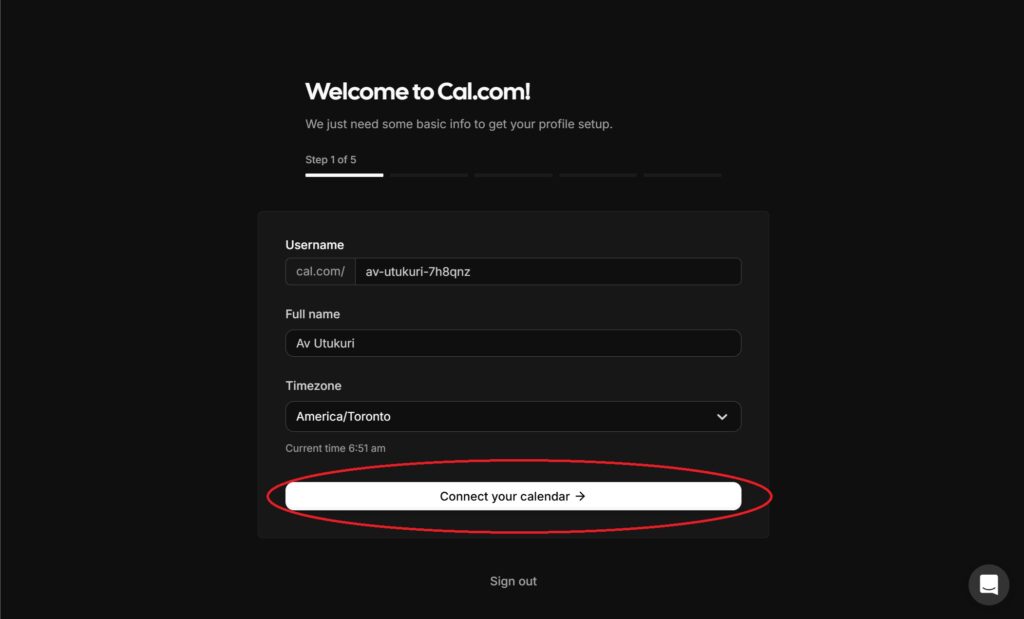
Setup your account. You can connect your calendar, and setup your profile here. If you don’t see your calendar provider (Apple, Google), don’t worry, you can set this up later.
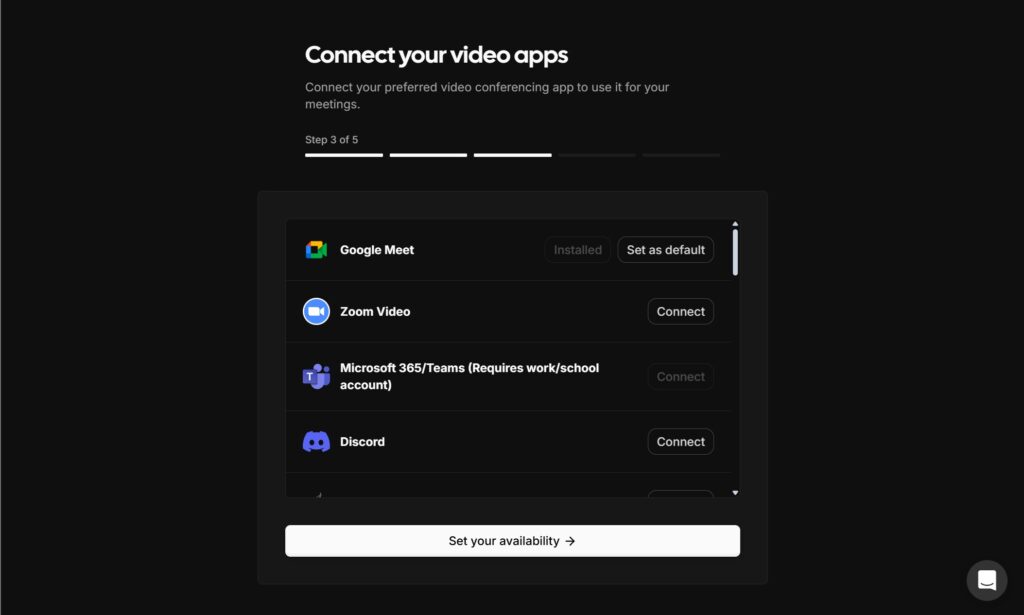
Connect your video conferencing app and complete your profile
If you did not setup your calendar\conferencing app in the previous step, you can do it here.
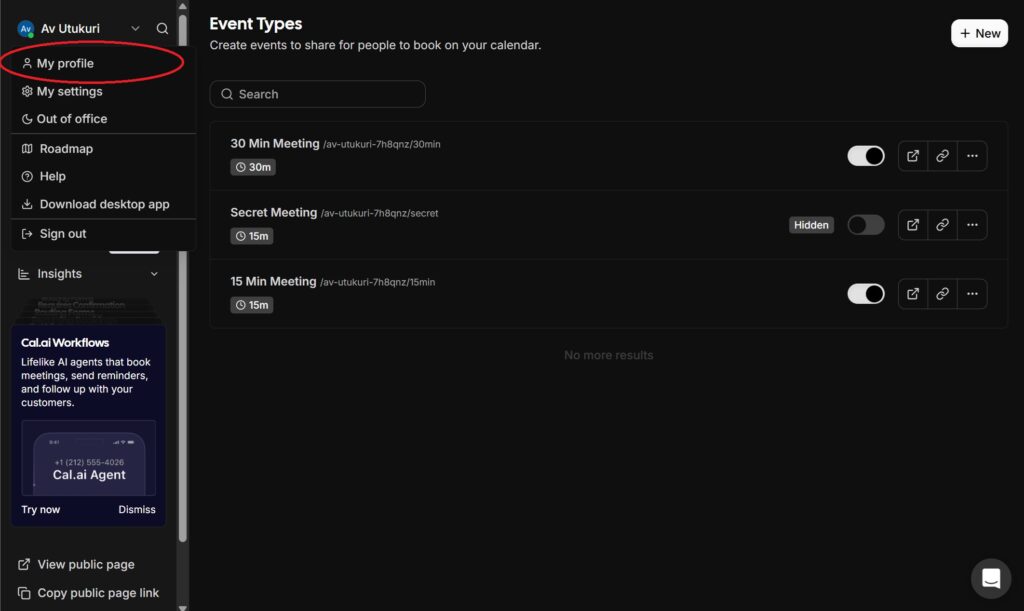
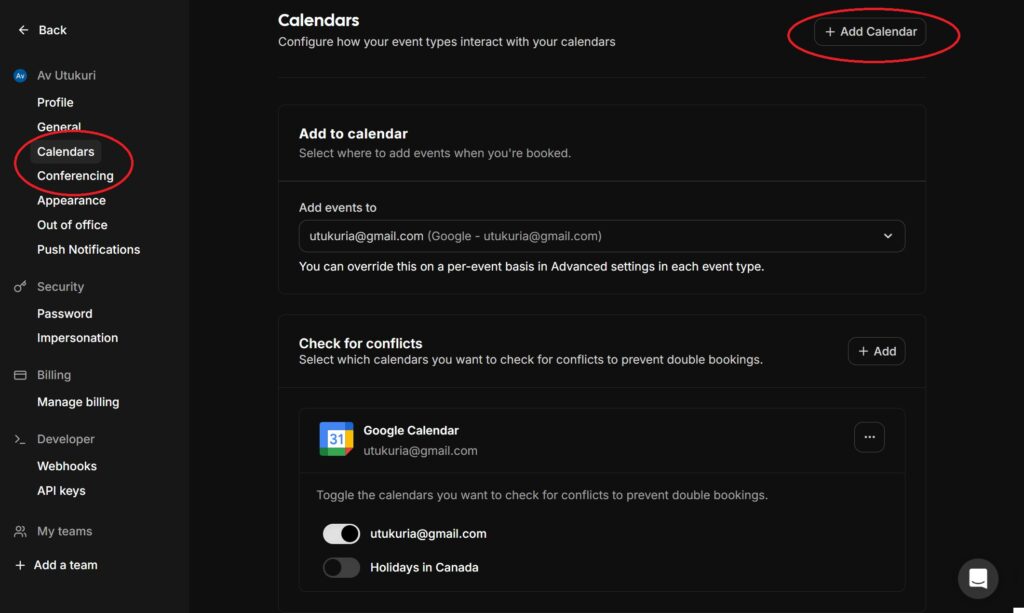
On the top left hand corner, click on your name and select My Profile in the dropdown.
Here, you can add additional types of calendars and video conferencing providers. Make sure that you complete the connections, and that you can see your connections in the list.
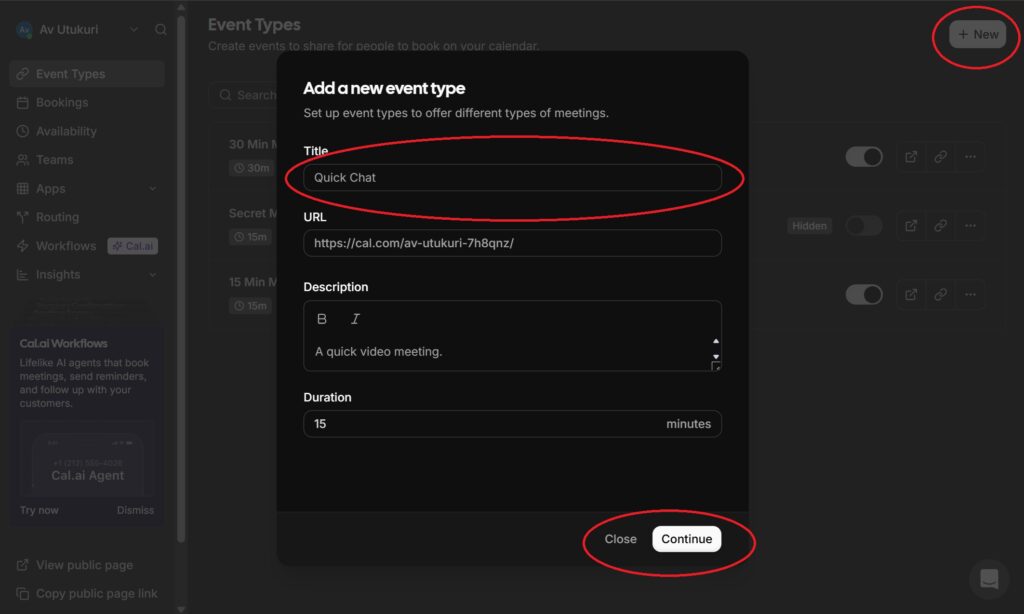
Go back to the homepage. Add a new event type and fill in all of the required information. This is the ‘event’ that the AI agent will be booking on your behalf. Name it appropriately, for example: “Discovery call”, “Initial assessment”, or “Site visit”. Whatever title best describes the event.
When you create the event, make sure that you configure the location details correctly. If this is an in-person appointment, add your location address, or select the video conferencing app for remote meetings.
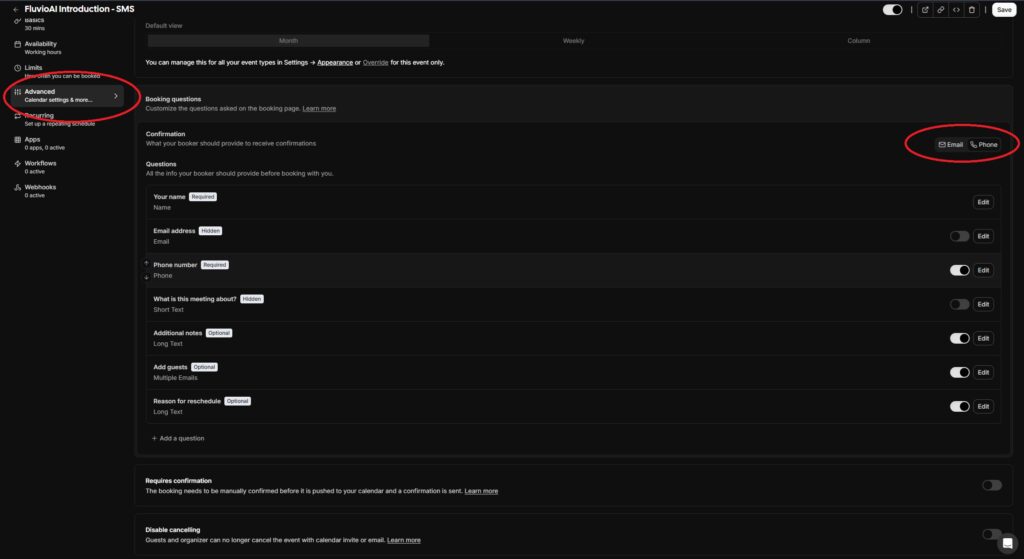
The system has the ability to send confirmation message via email and\or SMS messages. You might have a lot of customers that don’t use email. In that situation, you have the choice to create two different event IDs, one for email and one for phone based SMS confirmation.
When you create the event, use the Advanced Settings menu to select Phone or Email.
HINT: you can support both methods, just create TWO events. One with the phone setting, and the other with the email setting. Then you can enter BOTH event IDs into the UI and you will be able to give your customers options.
2. Install the API
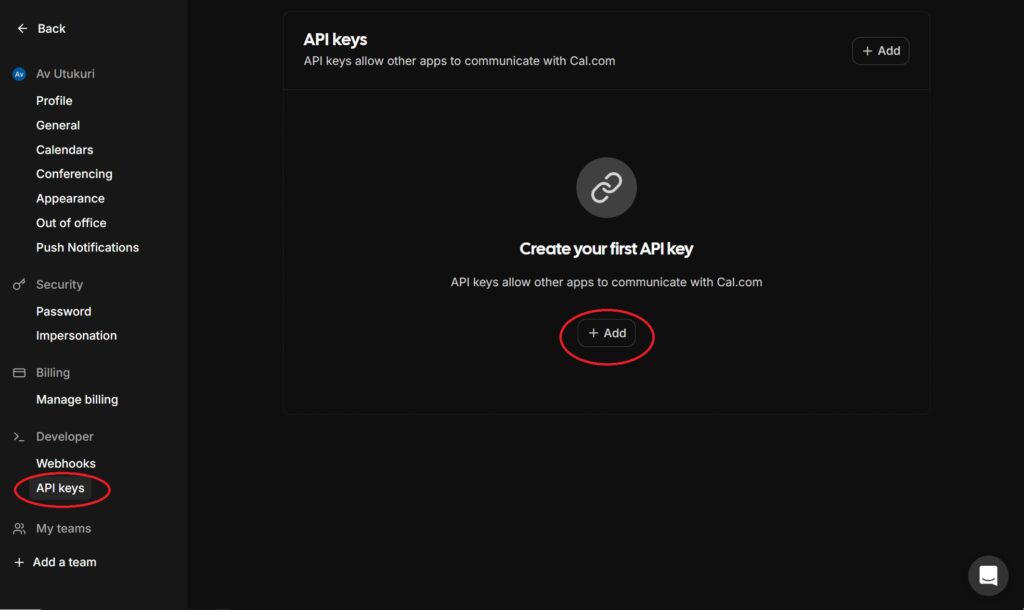
Next, go back to your profile (Click on your name at the top left corner, select ‘My Profile’).
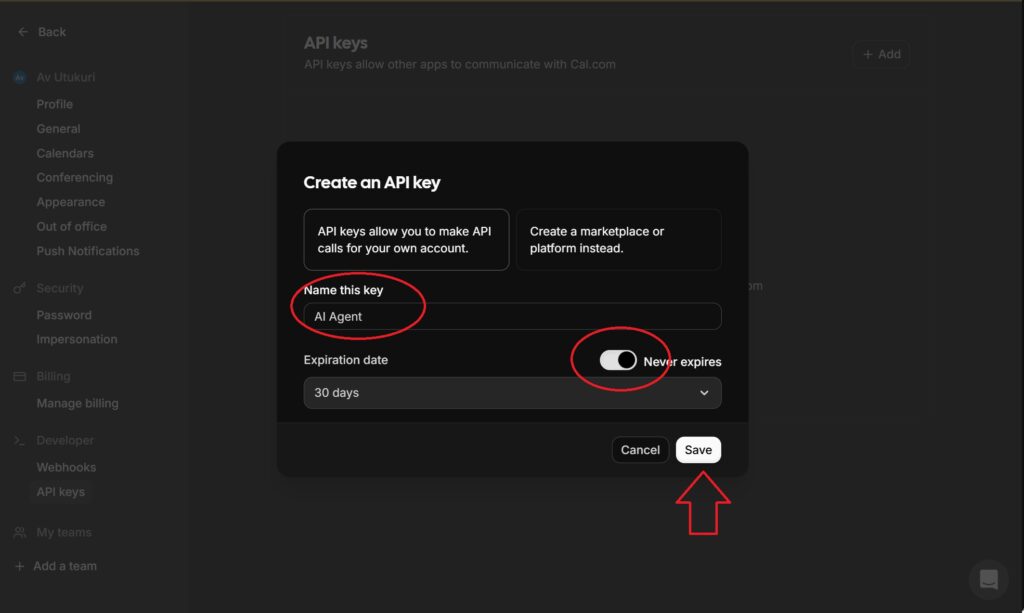
Click on API Keys in the side menu. Click on ‘Add’.
Create the API key by first naming the key. Call it something like “AI Agent”.
Make sure that you click on ‘Never Expires’. Save this key.
3. Collect the information
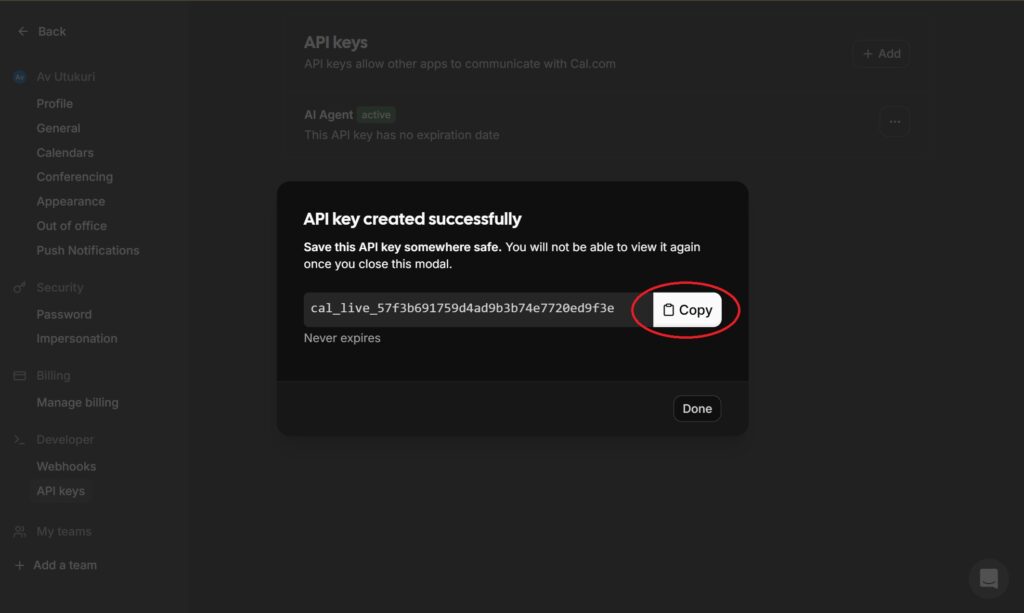
When you generate the key, make sure you copy this information. Copy and paste this into a document or an email. We will need this information.
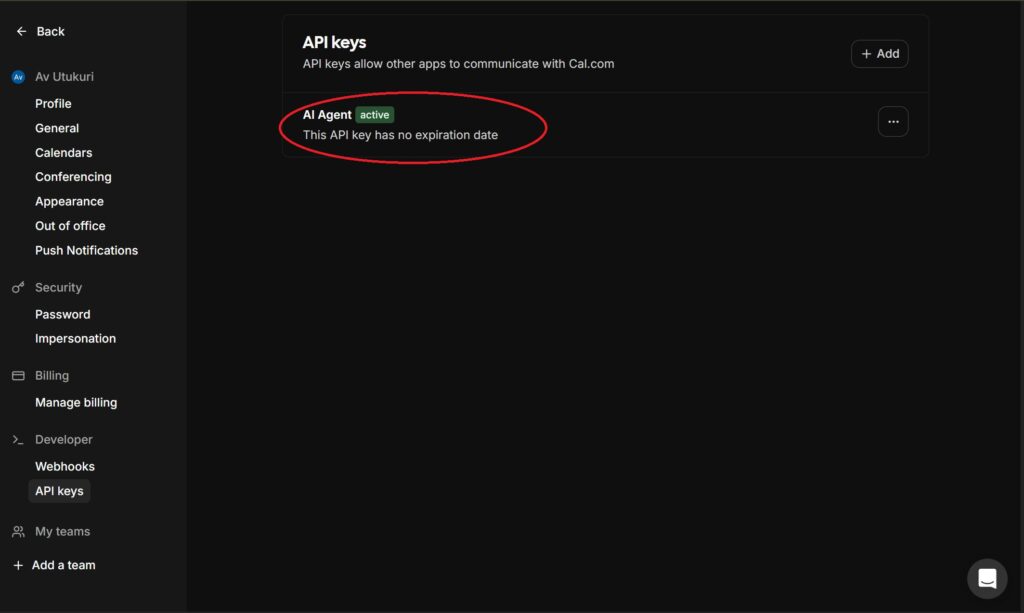
Make sure that you see your API Key in the list before continuing.
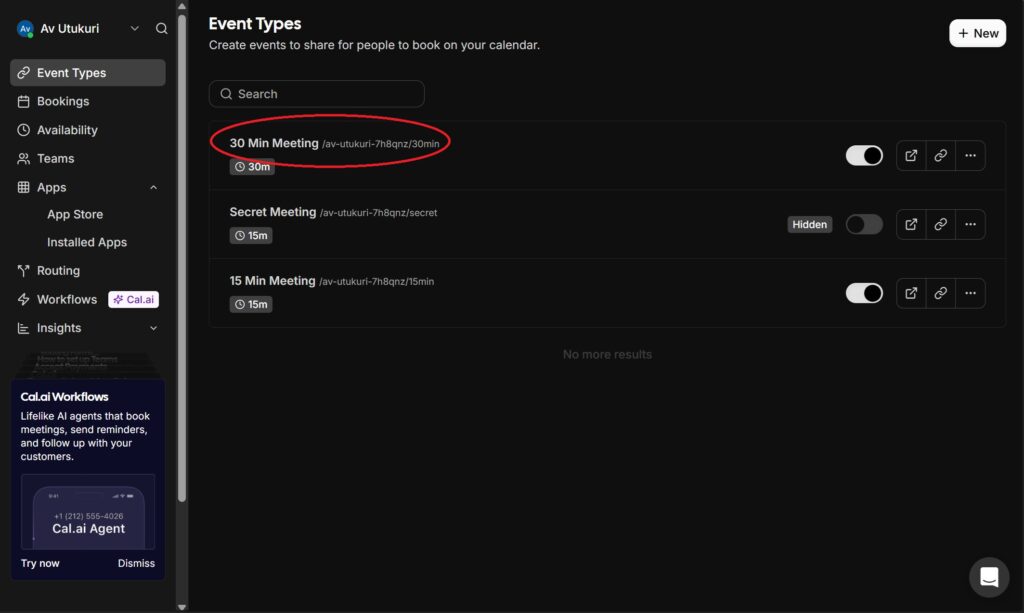
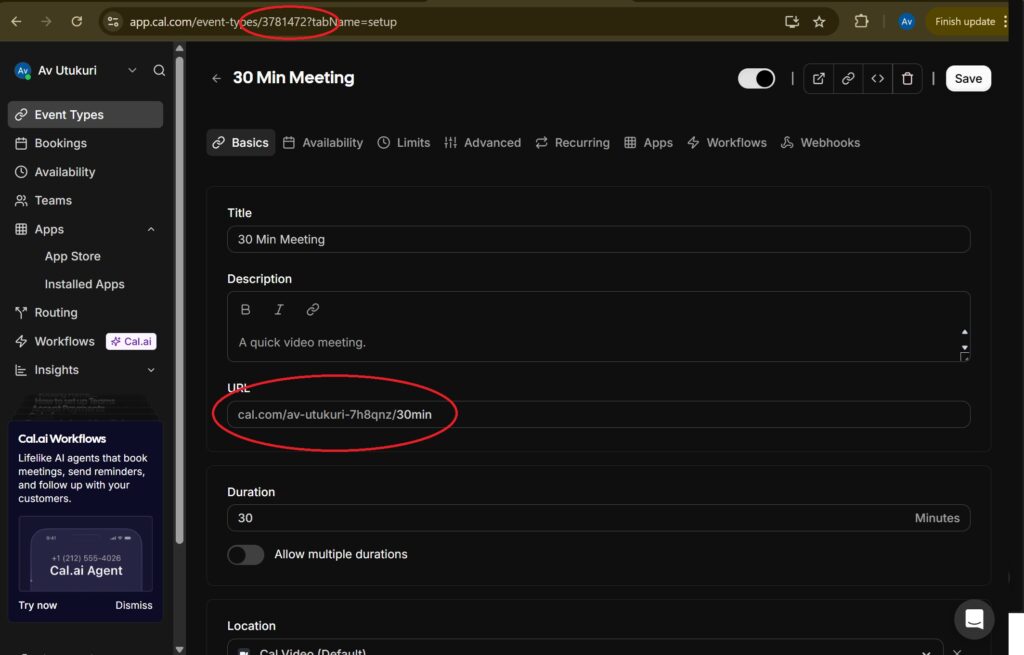
Final step! Go back to your home screen. Find your event, and click on the name of the event.
Click on the bold letters of the name so you can view the event.
In the address bar of your browser, you will see the Event ID of this particular event. Copy this information into a document, or email. For example, here it is 3781472.
Also, copy the Event URL to the same document.
That’s it! You are finished. This will allow us to connect your AI agent to this specific calendar and event.
Pease send this information to your FluvioAI project team member as an email: API Key, Event ID, Event URL.